Windshield Replacement in Bend Oregon: Detailed Step-by-Step Guide for Safe and Professional Auto Glass Replacement
This guide explains the full windshield replacement workflow for Bend, Oregon drivers, covering inspection, safe removal, replacement steps and ADAS recalibration
Windshield Replacement in Bend, Oregon — What You Need to Know
Windshield replacement is critical for restoring a vehicle’s structural integrity and ensuring that advanced driver assistance systems (ADAS) continue to perform correctly after damage. This comprehensive guide explains every step of the windshield replacement Bend OR process — from inspection and safe glass removal to urethane application, curing, and precise ADAS recalibration.
Many drivers in Central Oregon face uncertainty about whether to repair or replace a cracked windshield, how to handle insurance claims, or whether to use a service for windshield replacement near me. This article answers those questions with technician-level detail and practical checklists. You’ll learn how professionals diagnose damage, prep the pinchweld, and select the right glass type and urethane chemistry for safe drive-away times. We’ll also cover why static versus dynamic ADAS calibration is essential for lane-keep assist and automated emergency braking systems.
To help Bend drivers make confident decisions, we’ve also included local insurance claim workflow tips and a detailed comparison between mobile and in-shop windshield replacement Oregon services. Read on for step-by-step procedures, EAV comparison tables for OEM vs. aftermarket glass, calibration methods, and actionable preparation lists to ensure your vehicle is ready for safe installation.
What Are the Initial Steps in the Windshield Replacement Process?
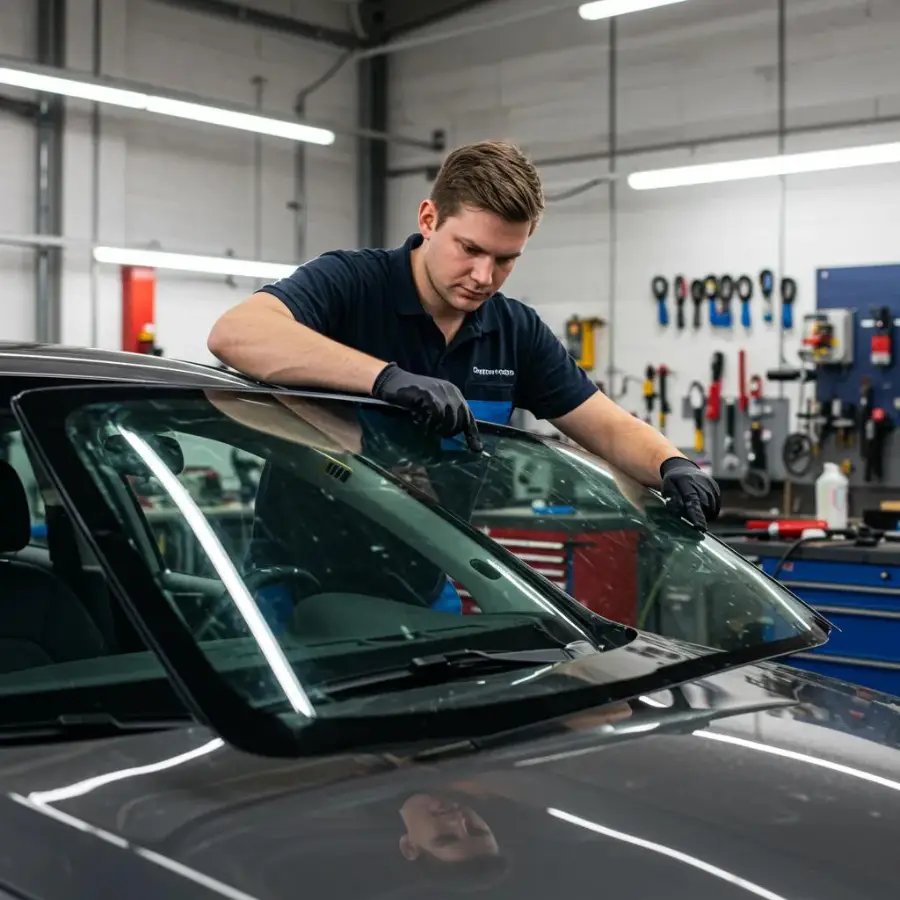
The windshield replacement process begins with a detailed inspection that identifies damage type, evaluates the structural impact, and determines how ADAS systems are affected. Technicians then make a repair-or-replace decision and prepare the vehicle accordingly. During inspection, they assess whether chips, edge cracks, or spidering compromise visibility or mounting integrity, and they carefully evaluate the pinch-weld condition and any windshield-mounted sensors.
Once the inspection is complete, the technician decides whether the damage can safely be repaired or if a full windshield replacement is necessary. Vehicle preparation includes protecting the interior, documenting sensor locations, and removing trim or accessories to avoid damage during glass removal. These careful prep steps ensure that ADAS hardware is properly handled and recalibrated during reassembly — a process covered in detail later in this guide.
Certified technicians follow standardized inspection checklists to ensure consistent, accurate results and proper insurance documentation. These checklists record chip diameter, crack length, proximity to the glass edge, and any obstruction of cameras or sensors. They also note the vehicle make, model, and specific ADAS features. This diagnostic report helps determine whether a simple repair is sufficient or if a complete windshield replacement service is required for safety and compliance.
Follow a maintenance program
Ante gravida id aenean quis egestas risus nam amet nullam leo diam diam aliquam eu eu malesuada arcu rhoncus suspendisse nulla mattis ut amet sagittis in justo egestas.

search for a trusted mechanic
Lorem ipsum dolor sit amet, consectetur adipiscing elit lobortis arcu enim urna adipiscing praesent velit viverra sit semper lorem eu cursus vel hendrerit elementum morbi curabitur etiam nibh justo, lorem aliquet donec sed sit mi dignissim at ante massa mattis.
- Neque sodales ut etiam sit amet nisl purus non tellus orci ac auctor
- Adipiscing elit ut aliquam purus sit amet viverra suspendisse potent
- Mauris commodo quis imperdiet massa tincidunt nunc pulvinar
- Excepteur sint occaecat cupidatat non proident sunt in culpa qui officia
Check the air pressure in your tires
Vitae congue eu consequat ac felis placerat vestibulum lectus mauris ultrices cursus sit amet dictum sit amet justo donec enim diam porttitor lacus luctus accumsan tortor posuere praesent tristique magna sit amet purus gravida quis blandit turpis.
Review your suspension frequently
At risus viverra adipiscing at in tellus integer feugiat nisl pretium fusce id velit ut tortor sagittis orci a scelerisque purus semper eget at lectus urna duis convallis. porta nibh venenatis cras sed felis eget neque laoreet suspendisse interdum consectetur libero id faucibus nisl donec pretium vulputate sapien nec sagittis aliquam nunc lobortis mattis aliquam faucibus purus in.
- Neque sodales ut etiam sit amet nisl purus non tellus orci ac auctor
- Adipiscing elit ut aliquam purus sit amet viverra suspendisse potent
- Mauris commodo quis imperdiet massa tincidunt nunc pulvinar
- Excepteur sint occaecat cupidatat non proident sunt in culpa qui officia
Service your vehicle as regularly as posible
At risus viverra adipiscing at in tellus integer feugiat nisl pretium fusce id velit ut tortor sagittis orci a scelerisque purus semper eget at lectus urna duis convallis. porta nibh venenatis cras sed felis eget neque laoreet suspendisse interdum consectetur libero id faucibus nisl donec pretium vulputate sapien nec sagittis aliquam nunc lobortis mattis aliquam faucibus purus in.
“Nisi quis eleifend quam adipiscing vitae aliquet bibendum enim facilisis gravida neque velit euismod in pellentesque”
Conclusion
Eget lorem dolor sed viverra ipsum nunc aliquet bibendum felis donec et odio pellentesque diam volutpat commodo sed egestas aliquam sem fringilla ut morbi tincidunt augue interdum velit euismod eu tincidunt tortor aliquam nulla facilisi aenean sed adipiscing diam donec adipiscing ut lectus arcu bibendum at varius vel pharetra nibh venenatis cras sed felis eget.
How Is Windshield Damage Inspected and Assessed?
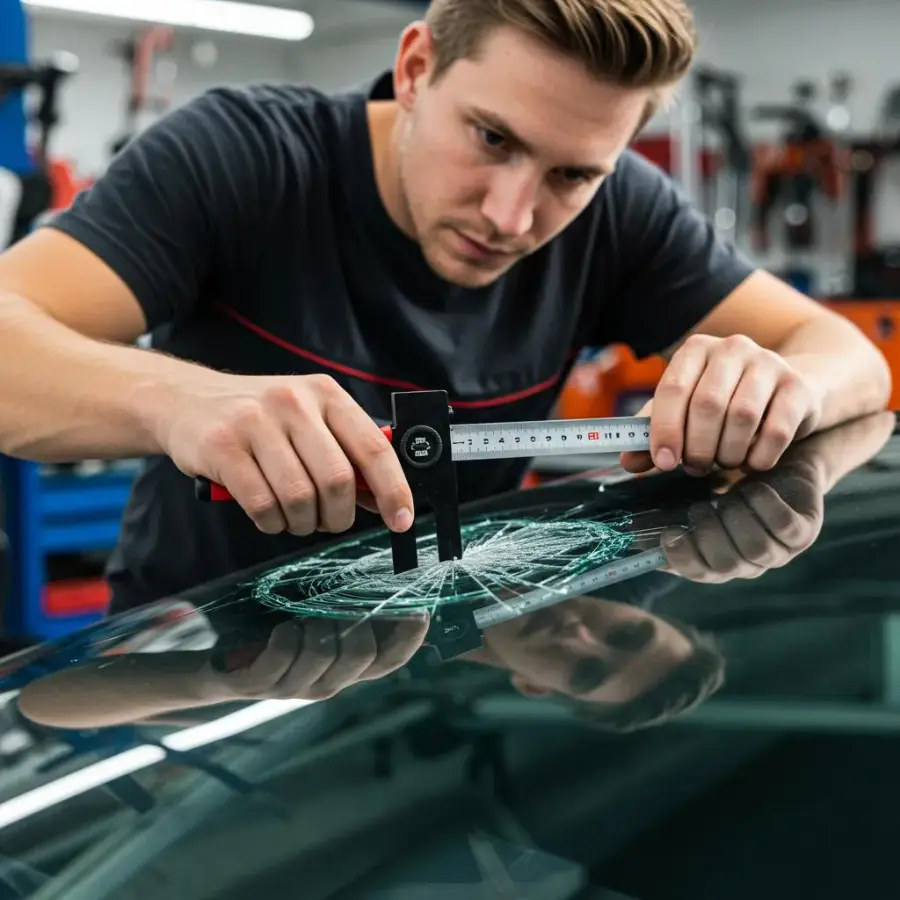
Windshield damage inspection defines the defect type, location, and severity and evaluates optical performance for ADAS cameras. Technicians classify defects as chips, star breaks, edge cracks, or long-line cracks and measure metrics such as chip diameter and crack length; they also assess whether a crack reaches the pinchweld or compromises adhesion. Optical assessment for ADAS includes verifying camera alignment, recording lens cleanliness, and testing the camera's field of view with diagnostic tools to confirm unobstructed sightlines. Inspecting the mounting flange and surrounding body for rust or previous repairs is equally important because underlying corrosion can affect bonding. Accurate assessment leads directly into the repair-versus-replace decision and ensures the chosen remediation preserves both structural safety and sensor performance.
When Should You Choose Repair vs. Replacement?
Choosing repair versus replacement hinges on damage size, location, depth, and impact to ADAS sensors as well as legal and safety thresholds in practical technician guidelines. Generally, small surface chips under a specified diameter and away from the driver's sightline can be repaired to restore structural and optical properties, while edge chips, long cracks, and damage that intrudes into the sensor zone require replacement. Technicians weigh long-term safety, the probability of crack propagation under Central Oregon temperature swings, and ADAS optical demands when recommending replacement. Cost considerations are secondary to safety: while repair may be less expensive, replacement provides predictable optical quality for ADAS and restores bond strength to manufacturer tolerances. The decision naturally leads to the technician's next steps for vehicle preparation and removal planning.
How Do Technicians Prepare Your Vehicle for Windshield Replacement?
Vehicle preparation protects interior components, documents ADAS hardware, and creates a safe workspace for removal and installation. Technicians remove trim, mirrors, and windshield-mounted sensors as required, mask and cover seats and dash to prevent glass and adhesive contamination, and note software or calibration settings relevant to ADAS. They may disconnect the battery or take precautions recommended by the vehicle manufacturer to avoid electrical issues with sensors, and they record camera serials or alignment marks so calibration is reproducible. Clear pre-install documentation and protective measures minimize risk of damage and ensure the installation team can proceed to controlled removal, which we describe in the next section.
- Inspect and document damage type, dimensions, and ADAS sensor locations.
- Decide repair vs replacement based on structural and optical criteria.
- Protect the interior, remove trim and accessories, and note calibration data.
- Prepare tools and workspace for safe removal and pinchweld preparation.
This list highlights the flow from inspection to prep; next we examine how technicians safely remove the old windshield.
How Is the Old Windshield Safely Removed in Bend Oregon?
Safe windshield removal focuses on preventing vehicle damage, protecting ADAS hardware, and avoiding contamination of the pinchweld so new urethane bonds correctly. The removal mechanism varies with vehicle design and urethane thickness, but the core reasons are the same: cut old adhesive, lift glass without distorting the frame, and inspect the pinchweld for corrosion or residual material. Technicians choose tools based on access to the urethane bead, the presence of adhesive retainers, and manufacturer guidance; they work methodically to avoid nicking paint or deforming the A-pillar. After removal, attention shifts to pinchweld cleaning, rust treatment, and primer application to create a dry, contaminant-free bonding surface for the new glass. The next subsection details removal tools and technique selection.
Before the table below, here is a bulleted list of safety priorities during removal:
- Protect painted surfaces and trim with non-abrasive covers.
- Avoid sharp tool contact with pinchweld and A-pillars to prevent body damage.
- Secure glass fragments and manage waste to protect occupants and environment.
This safety focus transitions into tool-specific comparisons and best-practice removal workflows.
What Tools and Techniques Are Used for Windshield Removal?
Technicians select between manual and powered cutting tools-cold knives, wire-cutters, and reciprocating or oscillating power tools-based on urethane thickness and vehicle access restrictions. Cold knives provide tactile control and minimize vibration, making them preferable where precision is required and access is limited, while wire techniques allow cutting large beads from both inside and outside with minimal glass flex. Powered tools speed removal on thick urethane or difficult corners but require training to avoid body damage or glass shattering. Safety protocols include wearing eye protection, using lift assists to handle the glass safely, and employing plastic shields to protect interior trim; technicians also document any abnormal resistance that could indicate corrosion. Proper tool selection reduces risk and preserves the pinchweld for the next preparation phase, which we cover in the following subsection.
How Is the Pinchweld and Frame Cleaned and Prepared?
Pinchweld preparation restores a clean, dry metal surface free of old urethane, primer residues, and rust so primers and adhesives can bond as specified by automotive safety standards. Technicians remove old adhesive mechanically, treat any rust with appropriate rust converters or mechanical abrasion, and apply a compatible automotive primer in thin, even coats to promote chemical adhesion with the urethane. After priming, the pinchweld must remain free of oils, dust, and moisture until adhesive application; technicians use solvent wipes and tack-free timing to ensure primer cure compatibility. Poor preparation leads to bond failure and potential safety issues, so technicians verify cleanliness before installing the new glass. With the pinchweld prepped, the team moves on to glass selection and adhesive application described next.
Below is a comparison table showing common removal tools, their characteristics, and risk considerations to aid decisions.
What Are the Key Steps to Installing a New Windshield?
Installing a new windshield involves selecting compatible glass, applying primer and urethane correctly, setting the glass with precision, and observing cure and safe drive-away times to restore structural integrity and ADAS optical performance. Glass must match vehicle-specific curvature and any coatings required for camera clarity; technicians verify fit and sensor mounting locations before adhesive application. Correct primer application and a properly profiled urethane bead ensure full contact and prescribed bond thickness; environmental conditions such as temperature and humidity directly affect cure times. After setting the glass, technicians reinstall trim, reattach wipers and mirrors, and perform functional checks, including ADAS pre-calibration checks that precede formal calibration. The following subsections go through OEM vs aftermarket choices, adhesive techniques, cure timing, and final reassembly.
- Verify correct glass match and ADAS compatibility.
- Apply primer to pinchweld and glass contact areas per product instructions.
- Dispense urethane bead with controlled profile and set the glass to alignment marks.
- Allow manufacturer-recommended cure time, then reassemble trim and test systems.
This ordered workflow leads into the OEM vs aftermarket decision factors summarized next.
How Do Technicians Choose Between OEM and Aftermarket Glass?
Technicians choose OEM or aftermarket glass by comparing fit, optical coatings, ADAS compatibility, warranty, and lead time to balance safety and cost for each vehicle. OEM glass typically adheres to manufacturer specifications for curvature, sensor mounting, and coatings that affect camera optics, while quality aftermarket glass may match fit and cost less but can vary in coating tolerances important for ADAS cameras. Technicians consider whether the glass includes manufacturer sensor mounts, rain-sensing film, or specialized coatings when selecting parts for ADAS-equipped vehicles. Warranty terms, availability, and cost are weighed against the need to restore factory optical alignment and long-term performance. The EAV table below summarizes these trade-offs to help technicians and vehicle owners make informed decisions.
How Is Primer and Urethane Applied for Optimal Bonding?
Primer and urethane application achieves a chemical bond between the glass and vehicle frame by creating compatible surfaces and a continuous adhesive bead that cures under predictable conditions. Technicians apply primer sparingly to both the pinchweld and the glass flange, allowing specified flash times before adhesive application to avoid contamination; primers promote adhesion by chemically preparing oxidized metal and glass. Urethane beads are dispensed with consistent bead geometry and volume—typically a triangular or D-shaped profile - ensuring complete contact and avoiding voids that can reduce strength. Environmental controls such as temperature and humidity are monitored because low temperature or high moisture extend cure times and can trap solvents. Quality checks include bead continuity inspection and gap verification before setting the glass, and these preparation steps feed into cure timing and safe drive-away considerations discussed next.
What Is the Importance of Cure Time and Safe Drive-Away Time?
Cure time defines when adhesive attains sufficient strength to resist dynamic loads; safe drive-away time (SDAT) is the practical window technicians use before allowing vehicle operation. Cure chemistry depends on adhesive type-urethane adhesives vary in polymerization rate - and on temperature and humidity; typical SDAT ranges from 30 minutes under optimal conditions to several hours in cold, wet environments. Technicians consider vehicle weight, expected dynamic loads (e.g., steep roads or off-road), and ADAS calibration timing when setting conservative SDATs to ensure occupant safety and bond reliability. Driving too soon risks adhesive failure during an impact and may void warranty or insurance coverage. After cure verification, technicians proceed to reassemble trim and confirm system function, which the next subsection addresses.
How Are Trim and Wipers Reassembled After Installation?
Reassembly restores exterior trim, moldings, wipers, and electrical connections while ensuring weather sealing and mechanical function are correct before handoff. Technicians reinstall trim in a prescribed order, torque fasteners to manufacturer guidance, and align wipers so they park correctly without binding; improper reassembly can cause leaks or noise. They perform leak testing and visual inspections and verify washer fluid and wiper operation along with camera line-of-sight checks to confirm there are no obstructions. A final inspection includes a functional ADAS pre-check and customer documentation of the work performed. This reassembly and testing finish the physical installation and lead directly into the ADAS calibration phase.
Follow a maintenance program
Ante gravida id aenean quis egestas risus nam amet nullam leo diam diam aliquam eu eu malesuada arcu rhoncus suspendisse nulla mattis ut amet sagittis in justo egestas.
search for a trusted mechanic
Lorem ipsum dolor sit amet, consectetur adipiscing elit lobortis arcu enim urna adipiscing praesent velit viverra sit semper lorem eu cursus vel hendrerit elementum morbi curabitur etiam nibh justo, lorem aliquet donec sed sit mi dignissim at ante massa mattis.
- Neque sodales ut etiam sit amet nisl purus non tellus orci ac auctor
- Adipiscing elit ut aliquam purus sit amet viverra suspendisse potent
- Mauris commodo quis imperdiet massa tincidunt nunc pulvinar
- Excepteur sint occaecat cupidatat non proident sunt in culpa qui officia
Check the air pressure in your tires
Vitae congue eu consequat ac felis placerat vestibulum lectus mauris ultrices cursus sit amet dictum sit amet justo donec enim diam porttitor lacus luctus accumsan tortor posuere praesent tristique magna sit amet purus gravida quis blandit turpis.
Review your suspension frequently
At risus viverra adipiscing at in tellus integer feugiat nisl pretium fusce id velit ut tortor sagittis orci a scelerisque purus semper eget at lectus urna duis convallis. porta nibh venenatis cras sed felis eget neque laoreet suspendisse interdum consectetur libero id faucibus nisl donec pretium vulputate sapien nec sagittis aliquam nunc lobortis mattis aliquam faucibus purus in.
- Neque sodales ut etiam sit amet nisl purus non tellus orci ac auctor
- Adipiscing elit ut aliquam purus sit amet viverra suspendisse potent
- Mauris commodo quis imperdiet massa tincidunt nunc pulvinar
- Excepteur sint occaecat cupidatat non proident sunt in culpa qui officia
Service your vehicle as regularly as posible
At risus viverra adipiscing at in tellus integer feugiat nisl pretium fusce id velit ut tortor sagittis orci a scelerisque purus semper eget at lectus urna duis convallis. porta nibh venenatis cras sed felis eget neque laoreet suspendisse interdum consectetur libero id faucibus nisl donec pretium vulputate sapien nec sagittis aliquam nunc lobortis mattis aliquam faucibus purus in.
“Nisi quis eleifend quam adipiscing vitae aliquet bibendum enim facilisis gravida neque velit euismod in pellentesque”
Conclusion
Eget lorem dolor sed viverra ipsum nunc aliquet bibendum felis donec et odio pellentesque diam volutpat commodo sed egestas aliquam sem fringilla ut morbi tincidunt augue interdum velit euismod eu tincidunt tortor aliquam nulla facilisi aenean sed adipiscing diam donec adipiscing ut lectus arcu bibendum at varius vel pharetra nibh venenatis cras sed felis eget.
Why Is ADAS Calibration Crucial After Windshield Replacement in Bend Oregon?
ADAS calibration is the process of restoring the alignment and function of vehicle sensors - particularly windshield-mounted cameras and sensors - so systems like lane-keep assist and automatic emergency braking perform as designed. Calibration corrects any change in camera position, optic properties, or sensor offsets introduced during glass replacement and ensures the vehicle's algorithms interpret the environment accurately. In Bend Oregon, local road geometry and driving conditions make precise calibration important for safety; calibration can be static (target-based) or dynamic (road-based), and selecting the correct method depends on the vehicle and sensor type. Skipping calibration increases the risk of false alerts, degraded detection, and liability concerns, so professional recalibration is a critical step following replacement. The next subsection defines ADAS components and their calibration needs.
After explaining calibration, note that professional ADAS calibration services are available locally and can be scheduled to ensure camera and sensor accuracy; technicians typically provide diagnostic scans, static target setups, and dynamic verification drives as part of the service.
What Is ADAS and Which Systems Require Calibration?
ADAS (Advanced Driver Assistance Systems) comprises subsystems that use cameras, radar, and sometimes lidar to support safety features like lane-keep assist, adaptive cruise control, and automatic emergency braking. Windshield-mounted components most commonly include forward-facing cameras and certain radar housings whose alignment is sensitive to glass position and optical coatings. Systems that typically require recalibration after windshield work include lane departure warning, lane-keeping assist, forward collision warning, and AEB because they rely on accurate optical inputs. Technicians identify which subsystems are present using diagnostic tools and shift to the appropriate calibration method - static or dynamics - based on the system type. Understanding which systems require calibration determines the process used, which we explain in the next subsection.
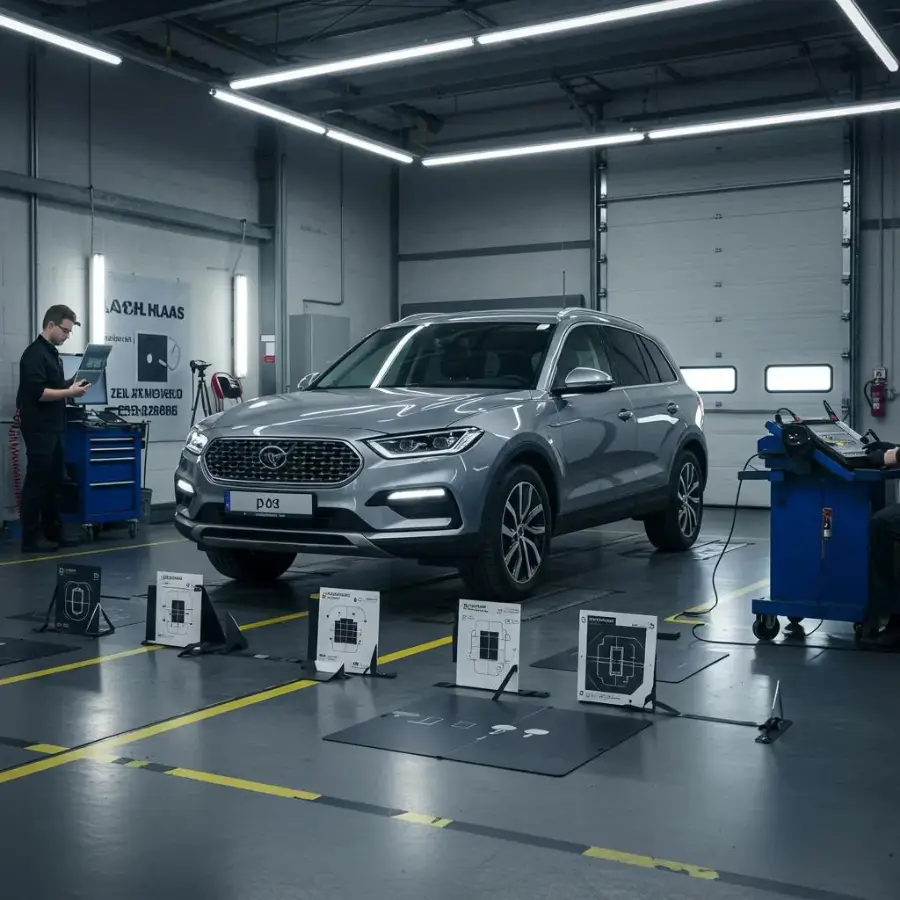
What Are the Differences Between Static and Dynamic ADAS Calibration?
Static calibration uses calibration targets in a controlled environment to align sensors precisely without driving, while dynamic calibration verifies sensor function during predefined road conditions or driving maneuvers. Static calibration requires a flat, level surface, precise target placement, and diagnostic equipment—devices like Autel or manufacturer-specific tools—to measure and set sensor offsets. Dynamic calibration involves driving at set speeds and may require specific lane markings or GPS-referenced procedures so the vehicle can self-adjust sensors while software records calibration parameters. Static methods are preferred when target access is possible and for camera calibrations needing high positional accuracy; dynamic methods validate real-world performance and are used when static setups are impractical. Choosing the proper method determines equipment and time required, which is summarized in the EAV table below.
What Are the Risks of Skipping or Improper ADAS Calibration?
Skipping or improperly performing ADAS calibration can cause misaligned sensors that yield false alerts, missed detections, degraded braking support, and ultimately increased collision risk. Miscalibrated cameras can misread lane markings, cause lane-keep assist to steer incorrectly, or fail to recognize pedestrians and vehicles, undermining driver trust in automated systems. From a liability perspective, improper calibration can complicate insurance claims and manufacturer warranty coverage in post-collision investigations. Technicians mitigate these risks with documented calibration procedures, diagnostic verification, and functional road tests, which are recommended to preserve both safety and legal clarity. The next section turns to cost and insurance considerations that affect how drivers choose service options.
After this ADAS detail, consider booking certified ADAS calibration services where technicians provide calibrated equipment, static target setups, and dynamic verification—services that many providers offer to ensure sensor accuracy for Bend Oregon drivers.
How Much Does Windshield Replacement Cost in Bend Oregon and What Insurance Options Are Available?
Windshield replacement cost in Bend, Oregon varies by vehicle model, glass type (OEM vs aftermarket), presence of ADAS, labor complexity, and whether mobile service is used, with typical ranges influenced heavily by ADAS recalibration needs. Factors like specialty coatings, heated elements, and sensors increase parts and labor costs because of additional calibration and precise fit requirements. Insurance interaction varies: many comprehensive policies cover glass with or without deductibles, and some local providers offer direct billing to insurers or insurance claim assistance to simplify the process. Understanding cost drivers and claim steps helps drivers make informed choices about parts selection and service location. The subsections below unpack pricing factors, the claims workflow, and shop selection criteria.
- Glass type and compatibility for ADAS-equipped vehicles.
- Labor time, removal difficulty, and pinchweld repair needs.
- Need for ADAS calibration (static target setup or dynamic road tests).
- Mobile service premium versus in-shop controlled environments.
This list frames the detailed cost-factor discussion that follows.
What Factors Affect Windshield Replacement Pricing?
Pricing depends on the glass part (OEM vs aftermarket), complexity of access to remove the old glass, presence of ADAS sensors requiring calibration, and whether pinchweld repair or rust treatment is needed. OEM glass and ADAS-ready components typically cost more but reduce risk of optical errors and calibration complications; aftermarket options may be less expensive but sometimes require additional adjustment. Labor rates reflect technician experience and the time required for precise primer and urethane application and for ADAS recalibration when necessary. Mobile windshield replacement can carry a convenience premium, especially for on-site service in remote or residential locations in Central Oregon, which is balanced against time savings for the vehicle owner. These cost drivers influence both out-of-pocket expense and insurance claim strategy, which we cover next.
How Do Insurance Claims Work for Auto Glass Replacement in Bend?
Filing a glass claim generally starts with documenting the damage, contacting your insurer to report a comprehensive glass claim, and providing photos and technician inspection notes; many insurers offer direct-glass claim processes to expedite service. Drivers should check whether their policy covers glass with or without a deductible and whether the insurer requires pre-authorization for aftermarket versus OEM parts. A practical claims checklist includes photos of damage, vehicle VIN, technician inspection report, and repair invoice to support reimbursement or direct billing. Some local providers assist customers by offering insurance claim assistance and direct billing options to insurers, reducing customer administrative burden while ensuring repairs meet safety standards.
- Clear photos of the damage from multiple angles.
- Technician inspection report noting ADAS presence and recommendation.
- Vehicle VIN and insurance policy details.
- Repair estimate and final invoice for claims submission.
This checklist helps prepare a smooth claims process and leads into criteria for choosing the right shop, addressed next.
What Should You Look for When Choosing an Auto Glass Shop in Bend Oregon?
When selecting a shop, prioritize certified technicians, documented ADAS calibration capabilities, clear warranty terms, and transparent communication about OEM vs aftermarket options and insurance handling. Look for shops that explain urethane types and safe drive-away times, provide written workmanship guarantees, and offer insurance claim assistance or direct billing to simplify the process. Customer reviews that reference ADAS recalibration and long-term sealing performance are helpful indicators, as are shops that use industry-standard diagnostic equipment for calibration. Choosing a shop with both mobile windshield replacement options and an in-shop controlled environment gives flexibility for weather-sensitive or calibration-critical jobs. The next section contrasts mobile and in-shop services to help you decide which setting suits your vehicle and needs.
Note: Many local providers offer insurance claim assistance and mobile windshield replacement as part of their service mix to support Bend drivers in minimizing downtime and administrative hassle.
What Are the Benefits of Mobile vs. In-Shop Windshield Replacement Services in Bend Oregon?
Mobile service offers convenience and reduced downtime by bringing technicians to your location, while in-shop service provides a controlled environment for precise adhesive curing and complex ADAS calibrations. Mobile windshield replacement Bend OR services can be ideal for simple replacements without heavy ADAS demands, and they minimize the need to tow or schedule time off. In contrast, in-shop service is recommended for vehicles requiring static calibration or when environmental controls are necessary to meet safe drive-away time specifications and to manage adhesive cure reliably. Weather in Central Oregon and the presence of dust or moisture can affect mobile procedures, so technicians evaluate the site before committing to on-site work. The following subsections examine mobile convenience and the scenarios that favor in-shop service.
- Mobile: Saves time, convenient for home or workplace visits, reduces vehicle downtime.
- Mobile: Limited by weather, surface flatness, and calibration target requirements.
- In-shop: Controlled temperature/humidity, full calibration rigs, and easier pinchweld repairs.
These trade-offs shape the choice of service depending on ADAS needs and local conditions, which we explore next.
How Does Mobile Service Provide Convenience and Safety?
Mobile service reduces logistical friction by performing replacements at the owner's location, minimizing downtime and avoiding vehicle transport, while maintaining safety through portable protective measures and trained technicians. Mobile technicians bring calibrated equipment for many common calibrations and employ protective coverings and lifting tools to maintain safety standards. However, environmental factors such as temperature, wind, and dust can affect urethane cure and optical cleanliness, so technicians assess site suitability and may recommend in-shop service for ADAS-critical or complex installs. Preparing the vehicle location and ensuring a clean, level workspace increases the success rate of mobile installs and sets the stage for any necessary recalibration, which may be completed on-site or scheduled for in-shop verification.
When Is In-Shop Service Recommended?
In-shop service is recommended when static ADAS calibration is required, when extensive pinchweld repair or rust treatment is necessary, or when environmental control is needed to achieve manufacturer-recommended cure times. Shops provide precise calibration target setups, specialized mounts, and controlled temperature and humidity conditions that improve bond strength consistency and calibration accuracy. For vehicles with advanced ADAS suites or complex sensor arrays, shops can perform combined static and dynamic calibration workflows and provide road-testing in a manner that's harder to replicate in a mobile setting. Choosing in-shop service reduces the risk of repeated adjustments and provides a controlled environment for the most safety-critical replacements. The final section outlines best practices for long-term windshield performance.
What Are the Best Practices to Ensure Long-Term Windshield Safety and Performance?
Long-term performance depends on correct urethane application, compliance with safety standards, proper ADAS calibration, and routine maintenance checks after installation. Ensuring the urethane bead has correct profile and cure time, verifying calibration with diagnostic tools, and documenting work and warranties are key practices technicians follow to prevent leaks and maintain structural safety. Regular inspections at 24 hours, 7 days, and 30 days after replacement help identify issues early—such as seal separation, trim fitment problems, or sensor drift—and allow prompt correction under warranty if needed. Preventive behaviors like avoiding high-pressure washing during the initial cure period and reporting any unusual noises or leaks quickly preserve the integrity of the installation. The following subsections detail urethane mechanics, certification importance, and maintenance steps.
- Avoid driving aggressively and avoid pressure washing for the first 24-48 hours.
- Inspect seals and trim after 24 hours and again at one week.
- Report any dashboard warning lights or ADAS alerts to the installer immediately.
- Keep documentation and warranty information accessible for follow-up.
This checklist transitions into technical explanations of adhesive mechanics and certification relevance.
How Does Proper Urethane Application Affect Structural Integrity?
Urethane adhesives chemically bond the glass to the body flange and serve as a primary structural element resisting roof crush and supporting airbag deployment dynamics. Proper application ensures continuous adhesive contact with correct bead geometry, adequate thickness, and full cure to achieve designed shear and peel strength values. Technicians follow verified application protocol-primer flash times, bead cross-section, and clean tool use-to avoid voids or contamination that weaken the joint. Quality control checks such as bead continuity inspection and pull-shear testing where applicable confirm bond integrity, which directly influences occupant safety in rollover or frontal collisions. Understanding urethane mechanics underscores why precise application and cure verification matter for vehicle safety, leading naturally into certification and standards discussion.
Why Is Certification and Compliance with Safety Standards Important?
Certification and compliance with standards like those set by industry bodies provide assurance that technicians and shops follow validated procedures that restore vehicles to safe operational condition. Certifications indicate training in adhesive chemistry, ADAS calibration procedures, and proper removal/installation techniques, while compliance with safety standards links repairs to predictable performance and liability protection. Selecting a shop with documented processes and adherence to recognized standards reduces post-repair surprises and supports warranty claims and insurance interactions. Certification also signals a commitment to continuing education as ADAS complexity evolves, which helps drivers maintain system reliability over time. This leads to the final subsection on practical ongoing maintenance.
How Can You Maintain Your Windshield After Replacement?
Routine maintenance focuses on early inspections, gentle cleaning practices, and prompt attention to new chips or seal issues to extend windshield life and preserve ADAS calibration. Inspect the seal area at 24 hours and again after one week for any gaps or water intrusion, avoid high-pressure washers for the first week to protect the adhesive bond, and use non-abrasive cleaners for glass surfaces to avoid optical damage. If new chips occur, address them quickly to prevent propagation; if ADAS warnings appear after replacement, return to the installer for diagnostic verification and recalibration as needed. Keeping the installation documentation and warranty information facilitates any necessary follow-up work and ensures long-term performance under manufacturer and insurance terms.
For a final practical note, contact local certified providers for an inspection and quote or to book replacement and ADAS calibration; they can assess your vehicle, advise OEM vs aftermarket choices, assist with insurance claims, and schedule the appropriate static or dynamic calibration workflow for Bend, Oregon conditions.
Follow a maintenance program
Ante gravida id aenean quis egestas risus nam amet nullam leo diam diam aliquam eu eu malesuada arcu rhoncus suspendisse nulla mattis ut amet sagittis in justo egestas.
search for a trusted mechanic
Lorem ipsum dolor sit amet, consectetur adipiscing elit lobortis arcu enim urna adipiscing praesent velit viverra sit semper lorem eu cursus vel hendrerit elementum morbi curabitur etiam nibh justo, lorem aliquet donec sed sit mi dignissim at ante massa mattis.
- Neque sodales ut etiam sit amet nisl purus non tellus orci ac auctor
- Adipiscing elit ut aliquam purus sit amet viverra suspendisse potent
- Mauris commodo quis imperdiet massa tincidunt nunc pulvinar
- Excepteur sint occaecat cupidatat non proident sunt in culpa qui officia
Check the air pressure in your tires
Vitae congue eu consequat ac felis placerat vestibulum lectus mauris ultrices cursus sit amet dictum sit amet justo donec enim diam porttitor lacus luctus accumsan tortor posuere praesent tristique magna sit amet purus gravida quis blandit turpis.
Review your suspension frequently
At risus viverra adipiscing at in tellus integer feugiat nisl pretium fusce id velit ut tortor sagittis orci a scelerisque purus semper eget at lectus urna duis convallis. porta nibh venenatis cras sed felis eget neque laoreet suspendisse interdum consectetur libero id faucibus nisl donec pretium vulputate sapien nec sagittis aliquam nunc lobortis mattis aliquam faucibus purus in.
- Neque sodales ut etiam sit amet nisl purus non tellus orci ac auctor
- Adipiscing elit ut aliquam purus sit amet viverra suspendisse potent
- Mauris commodo quis imperdiet massa tincidunt nunc pulvinar
- Excepteur sint occaecat cupidatat non proident sunt in culpa qui officia
Service your vehicle as regularly as posible
At risus viverra adipiscing at in tellus integer feugiat nisl pretium fusce id velit ut tortor sagittis orci a scelerisque purus semper eget at lectus urna duis convallis. porta nibh venenatis cras sed felis eget neque laoreet suspendisse interdum consectetur libero id faucibus nisl donec pretium vulputate sapien nec sagittis aliquam nunc lobortis mattis aliquam faucibus purus in.
“Nisi quis eleifend quam adipiscing vitae aliquet bibendum enim facilisis gravida neque velit euismod in pellentesque”
Conclusion
Eget lorem dolor sed viverra ipsum nunc aliquet bibendum felis donec et odio pellentesque diam volutpat commodo sed egestas aliquam sem fringilla ut morbi tincidunt augue interdum velit euismod eu tincidunt tortor aliquam nulla facilisi aenean sed adipiscing diam donec adipiscing ut lectus arcu bibendum at varius vel pharetra nibh venenatis cras sed felis eget.